Black Letter Gothic Calligraphy Tutorial 2020
Do you want to learn a new style of calligraphy that is bold and striking? Look no further than Black Letter Gothic Calligraphy! This elegant and classic form of lettering has a rich history and is perfect for adding a touch of sophistication to any project. In this tutorial, we will guide you through the basics of Black Letter Gothic Calligraphy, from understanding the structure of the letters to creating your own beautiful designs. By the end of this blog, you will be well on your way to mastering this stunning style of calligraphy and impressing your friends with your newfound skills. Let’s get started!
Black Letter Gothic Calligraphy Tutorial 2020
Hey guys what’s going on it’s me will Patterson and welcome back to a new video today I’m going to be showing you how you can create gothic hand lettering through procreate or just by drawing it on your iPad or on paper black letter calligraphy is really fun it’s really in Style and fashion right now people love it and there’s a lot you can do with it so I’m gonna give you a basic rundown in this video so make sure you watch to the end to find out exactly how I do it and get the textures on the Left ring too This video is brought to you by Squarespace get your own beautiful website today if you are someone who’s in the design industry or a creative or maybe you’re a hand lettering artist that needs a place to put their portfolio but customize the way it looks Squarespace is the place for you they’ve Got thousands of templates for you to choose from that have been beautifully designed professionally so you look the best it’s all easier than coding your own website I’ve been using them for years to sell my pro create brushes and to get client commissions if you would like to try squarespace out for yourself Click the link down below that gives you 10% off your first purchase with Squarespace.
Creating Consistent Grid
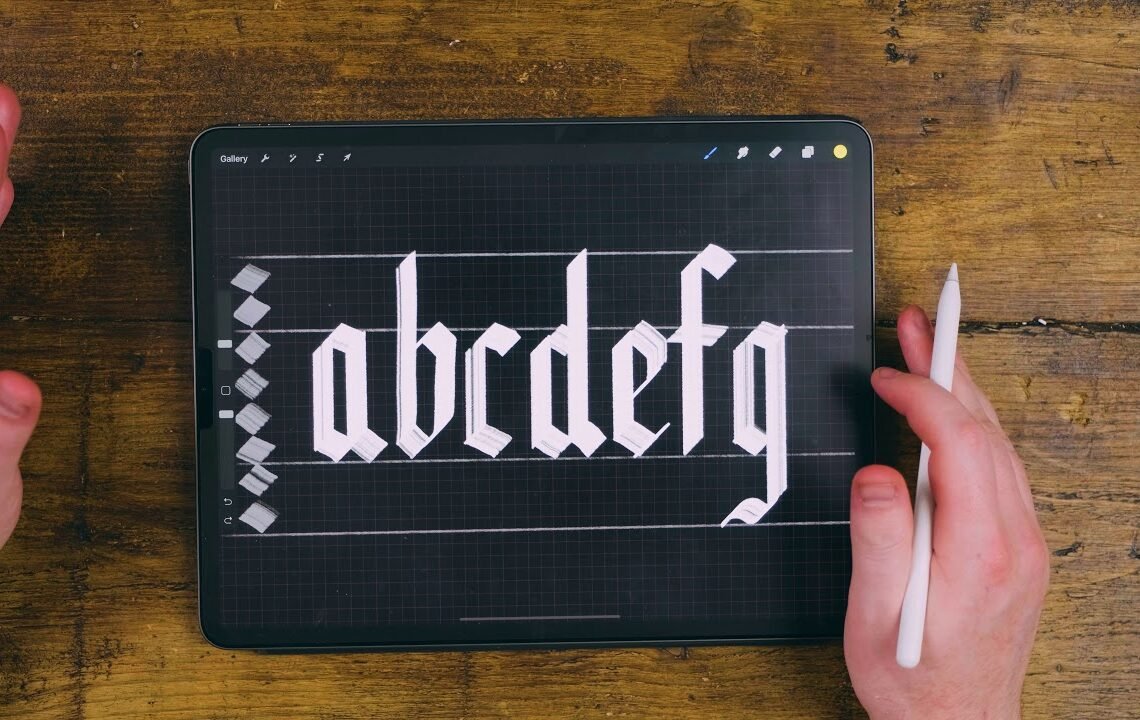
When you create black-letter and any sort of typography ever you’re going to want to keep everything consistent so what we’ve got here is like a grid now the way that this grid Works is when you create four of these squares or joined up that is going to be your X height so if I was going to draw an A or letter out an a for instance or just do it really quickly that’s a really quick one but you can see that This fully matches the width so that’s the sort of rule there if you have four of these squares that’s going to be your x height so you add another two for the ascender and then another two at the bottom for the d senders and that’s a Really quick rule of thumb to know how thick is going to be and how thin your line should be corresponding to your brush size now the brushes that I’m using in this tutorial are my gothic sets and you’ve got a lot here and you can go and purchase them online or Create them yourself I’ll leave a link down below in the description so once you’ve created your grid it doesn’t matter how long it is we’re just going to be working on a word or a few letters you want to do some practice now in any soil type form it’s Going to be similar so let’s start off again with the a so I’m going to go from my X height here and I’m going to make sure when I do it it’s going to come down there’s a little trick with the a and Datuk and it’s this so we’ve got a Straight line down on this angle here but then we also have this line here which goes off at a different angle and what we can do here to create the a we can create these lines like so and we can do these perfectly if you want to by Holding it down we get a straight line and you can get the full vertical straight line like so with your brush so that’s an A and it’s a very bad a because of my arm positioning here on the iPad when we do an O it’s gonna be Very similar but without the stem there so I’m going to show you what it’s like to do an O and there’s an O so you can see the similarities there everything is to do with these sort of lines that we’re creating which is down straight and then to the side everything is going To be created like that for instance if I was to create a B over here I’m really up to my ace under here come down I’m going to hold my finger there to keep it straight normally you wouldn’t do this normally when you’re doing on normal paper is you Would do it free-flowing like so but it’s quite hard to do on the iPad because you end up basically not getting the exact straightness and it doesn’t really work well for black-letter.
Creating Letters
The next one that would be the C so the C basically you come down like so and Then you want to confer that out the reason why we come further out with the C is because when we do this we want to make sure that it doesn’t look weird what this sort of match up here like so if we weren’t to do that and we do it Like a normal a you’d see that it goes a bit strange and a look so it was a bit missing so we need to go further out with the C the D is just like our backwards B and because we’re doing this in a modern style it’s a lot easier so Go ahead and create this line first create that create this and from here from the top of the a thunder come down and then you can sort of go ahead and create that again the e is like a C so we go ahead and really pull that out we Then do this line here on the side and you will have to undo it a few times to get it right all the way across and you can clip there if you do want to everything follows this pattern and it should be pretty self-explanatory after a while it shouldn’t take too long for You to work out how to do it it’s about keeping everything consistent and the more consistent your shapes are the easier your finest the G is a fun one because we have to go to the D Center options down here so we’ll create a normal low or half of a normal oh like This and when we come here and create this we want to come all the way down so I’m going to just do this straight here to about here and then from the O we come up and that’s a G now I’m not going to do the whole alphabet for you because The rules are already set in place here I’m going to show you a few more letters after this but just to recap you want to make sure that everything starts from the top to the bottom so we’re going down and when we go to the right like so You want to keep that consistent every time so you want this to be all the time consistent now you can see if there’s some Wiggly lines here and they’re very hard to get rid of you really have to practice it but what I would suggest to Do is have this as your placeholder and then you can create another layer on top and start actually refining it with the pencil drawing so good word to start off with practicing to do drills is the word minimum and the reason why it has to look consistent it’s all about your Consistency with the drill so I’m going to create an M this is going to start off the word a minimum which is a really good way to drill your Gothic lettering and it’s very happy to do because it’s right in front of me normally I’ll have My iPad like this on the side so I can do it because it best fits my posture so make sure you’re comfortable with it now you can see here the M was just a series of eyes and an eye is basically just this that is an eye and you can put a Little dot on top if you are the N is kind of like the…
FAQ about Black Letter Gothic Calligraphy Tutorial 2020
What is Black Letter Gothic Calligraphy?
Black Letter Gothic Calligraphy is a type of calligraphy characterized by its angular and intricate letterforms. It is often used for formal or decorative purposes.
Is a tutorial available for learning Black Letter Gothic Calligraphy in 2020?
Yes, there are many tutorials available online for learning Black Letter Gothic Calligraphy in 2020. These tutorials may include step-by-step instructions, practice sheets, and video demonstrations.
Do I need any special tools or materials to practice Black Letter Gothic Calligraphy?
While it is possible to practice Black Letter Gothic Calligraphy with basic calligraphy tools, such as a pen and paper, specialized tools such as a dip pen and ink may be recommended for achieving the desired look and feel of this calligraphy style.
Where can I find resources for Black Letter Gothic Calligraphy tutorials?
You can find resources for Black Letter Gothic Calligraphy tutorials on websites, blogs, and social media platforms dedicated to calligraphy. Additionally, books and online courses may also be available for learning this style of calligraphy.
I hope you find useful my article Black Letter Gothic Calligraphy Tutorial 2020, I also recommend you to read my other posts in my blog.
If you need help with anything join the community or do not hesitate to contact me.
Please consider joining my newsletter or following me on social media if you like my content.
Leave a Reply